One of the biggest adaptations to using scleral lenses for the first time is learning to insert the lenses. This can be especially challenging if the learner has experienced significant vision loss or if they have never worn any type of contact lenses before. The good news is that there are devices that can help, and you can even make one at home!
Scleral insertion devices can ease the learning curve and build confidence with your insertion and removal skills. Learn more about three of the adaptive lens insertion devices Dr. Morrison recommends below.
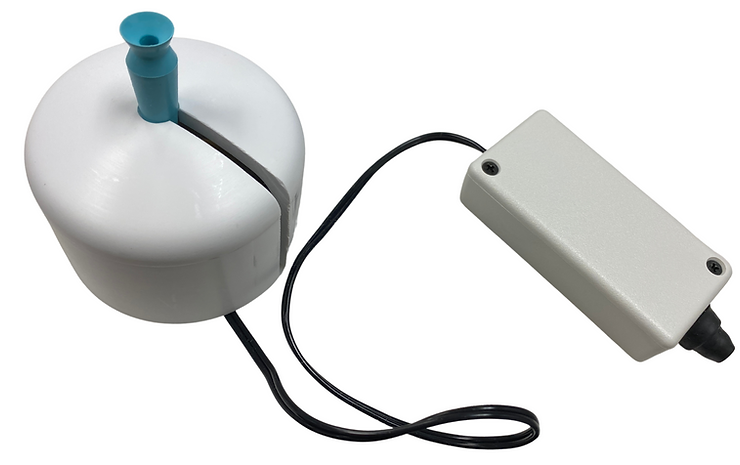
Dalsey Adaptives See-Green® Scleral Lens Inserter
- Dalsey Adaptives See-Green® Scleral Lens Inserter (Scleral Lenses)
This scleral inserter has an LED light shining through it to guide the lens-wearer during insertions. The green LED light serves as a focal point to center the lens and helps reduce stress and prevent flinching and involuntarily darting away of the eye. The stand allows the lens to be filled with saline in preparation for insertion without worry about spilling solution or having difficulty from unsteady hands. The design of the device eliminates the difficulty of spreading eyelids wide enough before lowering the eye to the lens by freeing up both hands. Learn more about the device and/or purchase one here.

CHIO Premium Hard Contact Lens Applicator/Remover
- CHIO Premium Hard Contact Lens Applicator/Remover (Scleral, GP, Hybrid, Soft Lenses)
CHIO is a handheld device that handles your contacts so you don’t have to. This device works for inserting and removal of all scleral and RGP lenses, and for application of all soft and hybrid contact lenses. Learn more about the device and/or purchase one here.
DIY light-up inserter with tools you can find in your home
- Make a DIY light-up inserter with tools you can find in your home (Scleral lenses)
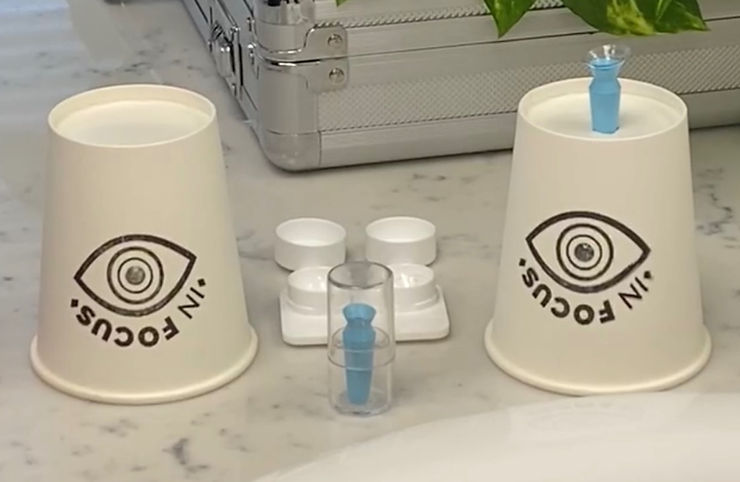
Before purchasing an insertion device, you might want to try one out at home to see if it works for you. To make your own insertion device, all you need is a disposable cup, a scleral insertions plunger and a light (you can use the light on your phone, a wireless LED puck light, or any light that fits under the cup).
This do-it-yourself device is mimicking the function of the See-Green® Scleral Lens Inserter, but will not last quite as long. This is a good thing to try if you are getting frustrated with inserting scleral lenses, and will help you decide if purchasing a specialized device is the best option for you. We send patients home with one to make sure it works for them.
Watch this tutorial on how to make your own device, or follow the instructions below:
– Poke a hole in the bottom of the cup.
– Cut off the end of your insertion plunger and stick it through the hole in the cup as shown below; it should be standing up vertically.
– Place the cup over your light of choice.
– Place lens onto of insertion plunger, fill with insertion fluid.
– Use one hand to pull back the upper eyelid, and one hand to pull back the lower eyelid, and lower your head over the cup. Your eyes should be looking down into the lens and you should be able to see the light coming through the hole in the plunger. This is the light that will guide you to the lens.
– Keeping your eye open, move your head down towards the lens until it is on your eye.
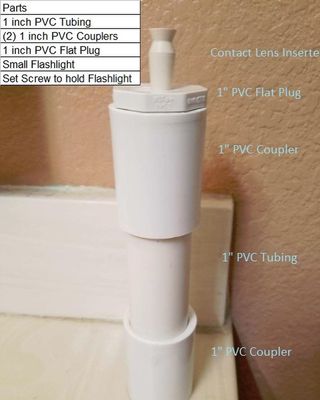
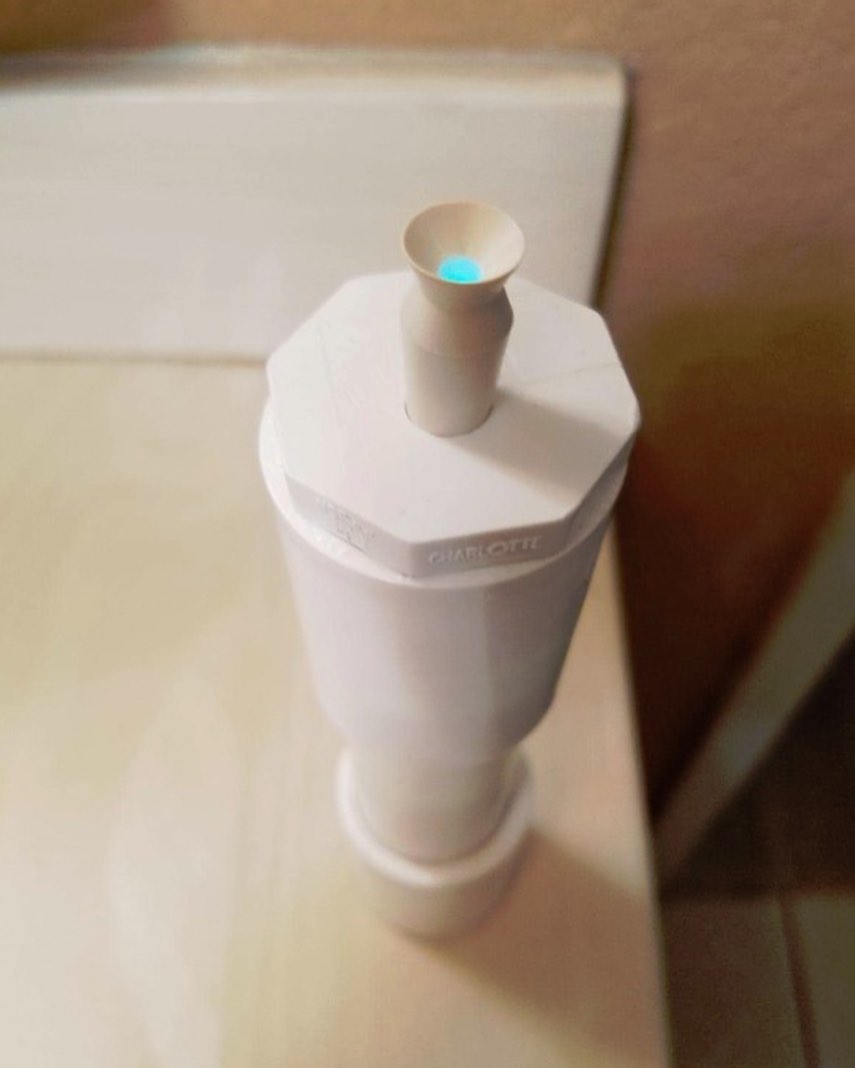
Check out this innovative light-up scleral lens stand created by our patient!
A patient of ours is an engineer by trade and a first-time scleral wearer with keratoconus. Like all first-time scleral wearers, it took a little time to get the hang of inserting the lenses, so they did a little research on scleral stands and decided to make their own using PVC tubing and couplers, a light from a flashlight, and a screw (see last image of the slideshow below for a list of parts).
They report that they use the stand every day and have no problems getting the lenses in, and even better, the lenses help improve their vision from 20/70 vision to 20/20!
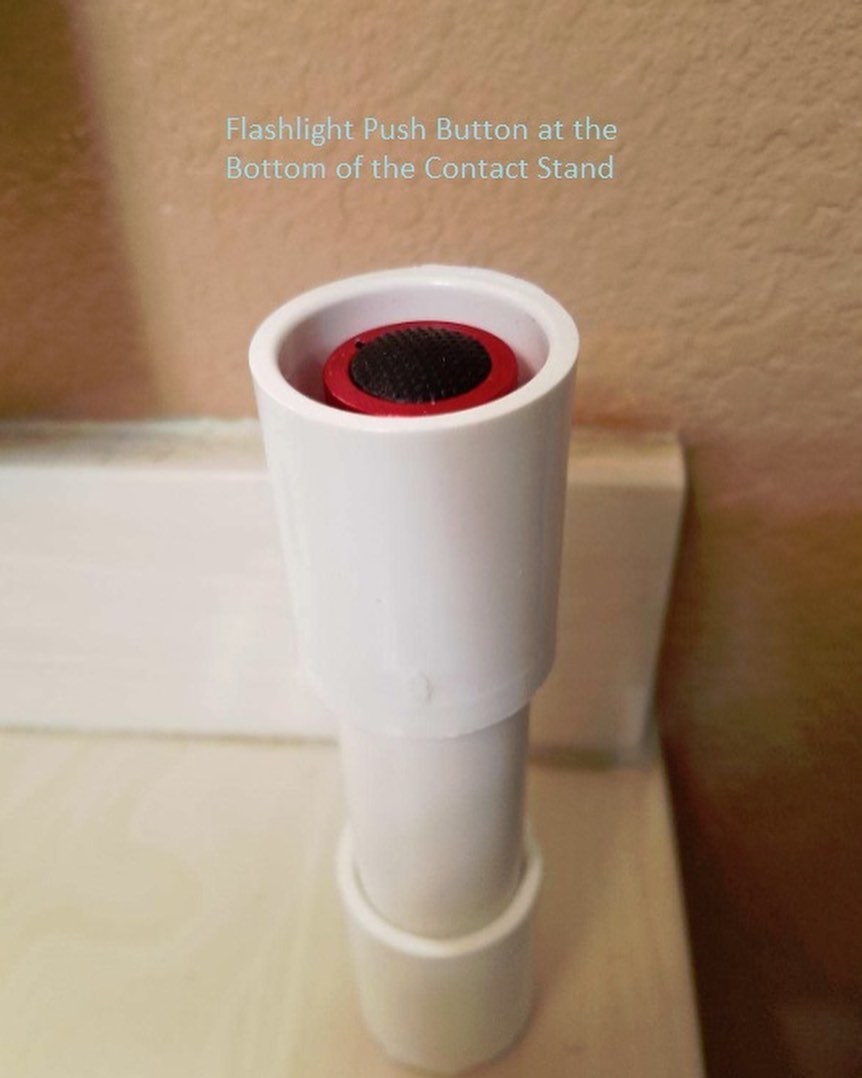
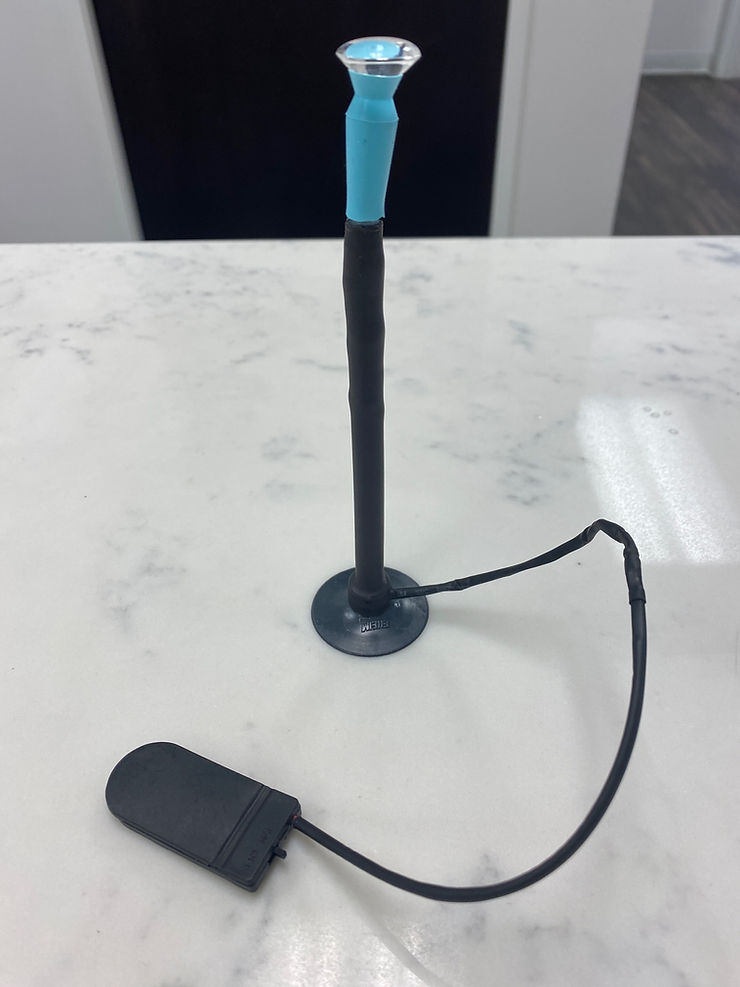
This light-up insertion device was designed and crafted by a supporter in Greece!
Let us know which of these devices have worked for you! Questions? Drop us a line here.
#ScleralLenses #Tutorial #AdaptiveDesign #ContactLenses #Keratoconus #DIY #DoItYourself #HowTo #Invention #Innovation #EngineeringDesign #Adaptives #AdaptiveDesign #AdaptiveDevices #2020Vision #CaseStudy #PatientSuccess #Optometry #Optometrist #Optometrista #ContactLensSpecialist #ICanSeeNow